Call 0333 003 0518
- Wooden Sheds Overlap Sheds Shiplap Sheds Tongue and Groove Sheds Pressure Treated Sheds Dip Treated Sheds Metal Sheds Plastic Sheds
- All Shed Sizes 5x3 Sheds 5x4 Sheds 6x3 Sheds 6x4 Sheds 7x5 Sheds 7x7 Sheds 8x6 Sheds 8x8 Sheds 10x6 Sheds 10x8 Sheds 10x10 Sheds 12x8 Sheds 12x10 Sheds 14x8 Sheds 16x8 Sheds
- Garden Workshops Cheap Sheds Large Sheds Small Sheds Pent Sheds Corner Sheds Lean To Sheds Potting Sheds
- Shed Accessories Shed Bases Shed Shelving Pet Houses Timber Treatments
- Wooden Garden Storage Metal Garden Storage Plastic Garden Storage Small Garden Storage Large Garden Storage
- All Garden Storage Bike Storage Log Stores Wheelie Bin Storage Garden Storage Boxes Garden Storage Benches Garden Cushion Storage Garden Tool Storage Decorative Garden Storage
- Garages Metal Garages Motorbike Garages Wooden Garages Carports
- Garden Bars Garden Arbours & Pergolas Garden Arches Gazebos Wooden Gazebos Garden Decking Decking Kits Door Canopies Patio Covers & Garden Awnings Garden Sleepers
- Garden Furniture Garden Chairs Garden Tables Garden Benches Garden Furniture Sets Wooden Garden Furniture Grow Your Own Planters Raised Beds Compost Bins Cold Frames
- Outdoor Accessories Solar Lights BBQs & Ovens Patio Heaters & Fire Pits Outdoor Toys Swings and Slides
My Basket
Checkout using your account
Checkout as a new customer
Creating an account has many benefits:
- See order and shipping status
- Track order history
- Check out faster
- Home
- Installation Guide: How to prepare your garden for a shed
Guide: How to prepare your garden for a shed
So you've bought your new shed, you're now waiting for it to be delivered and you've considered where you would like to build it in your garden. Below you will find example of what to do and what not to do, when preparing your garden.
Have you prepared the ground ready to install your new shed onto?
When installing a timber shed you must ensure that you have a even and level surface onto which you can build it. This can be made using either concrete, garden slabs or even timber decking. Failing to prepare a level surface will lead to your shed warping, which can result in damaged timber or even broken windows. If you're using one of our shed bases you will still need to clear the area for rubble. It's also a good idea to lay a weed proof membranes, to prevent growth and eventual damage to your shed.
But I've paid for a shed installation service, do I still need to prepare my garden?
Yes.


Examples of how to prepare your garden for a new shed:
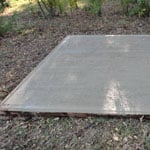

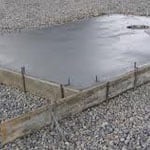

Concrete Hard-standing - When using concrete as a surface to support your new shed, you must ensure that it is level, flat and that it is dry in time for your shed delivery and installation. Here are the basic steps:
-
Using pegs and string, mark out the base area (allow 5 cm extra)
-
Dig a 15 cm deep, level hole - Insert a wooden framework to contain the concrete
-
Add a 7 cm deep level layer of stone or hardcore
-
Add the concrete cement mix – spread evenly and level off - Allow to fully set
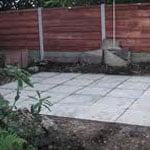

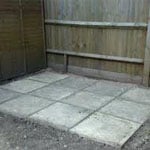

Garden Slab Base- A good alternative to using concrete is to use garden paving slabs. But once again these need to laid so as to create a level serface:
-
Dig out topsoil to about 7 cm deep
-
Add 4 cm layer of cement
-
Start in one corner and start to lay the slabs (use a spirit level)
-
Allow the cement to dry before building your shed
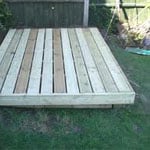

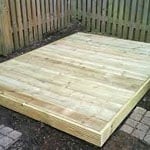

Using a timber decking base- This is a great way to quickly create a hard-standing for your new shed. You must ensure that it is level and should lay a weed proof membrane between the bare-ground and the base.
If building a log-cabin or summer house you can easily use this method to create a beautiful verandah area.


Examples of how NOT to prepare your garden for your new shed:
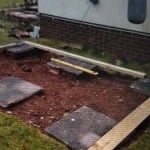

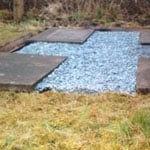

How not to lay garden slabs - Simply laying slabs loosely on top of gravel on in the corners does not create a stable base for your new shed. Please be aware that if you have paid for installation, our installers will not fix the situation for you.
By using an unstable base, your shed will warp which could result in damage or even broken windows.
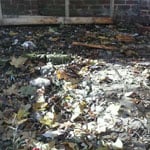

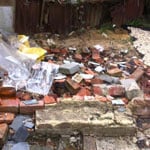

Rubble is not suitable hard-standing - You will need to clear any rubble, piles of leaves or other garden detritus from the area where you would like to build your shed. This is true, even if you have bought a timber shed base kit.
Please note – if you have paid for shed insulation, the installation team will not clear your garden for you and may not wait around for you to do so. Always prepare your garden in good time for your delivery.




Lawn, gravel or dirt are not suitable bases - It is not recommended that you build your new shed directly onto a lawn, bare ground or gravel. Not only can this result in subsidence and warping, but can also lead to damage from damp.


